
I decided to do a simple step by step picture filled instruction page on how to remove the head on a G3 Integra, now I already have an aftermarket radio in my car, but this makes no difference on "how" to get to where you got to get to get the factory radio out ")
Note! There is a super fast but hard method to get radio out, but you can't get it back in, the method I explain here is the "proper" way
Tools needed:
- Phillips Screwdriver (more preferable than a drill in my opinion)
- Small flathead to pry with
- 8mm socket and ratchet for factory radio removal
![Image]()
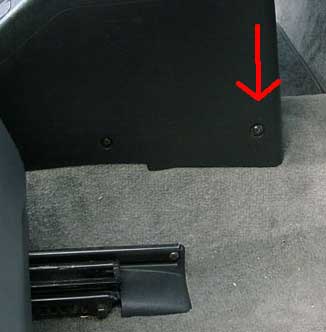
Slide both seats all the way forward, and remove these screws on each side.
(The screw to the left you do not have to remove)
![Image]()
Pry up the cover under the parking brake (you'll see a small slot of the left of it), and remove these two screws
No Picture for This Step
Pull out the center console by first pulling straight back about an inch, then up and around the park brake handle
![Image]()
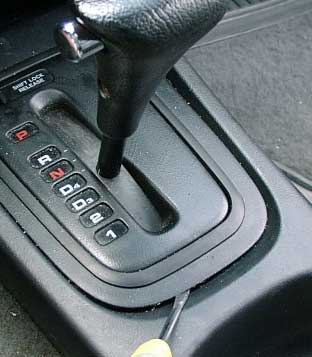
Gently pry at the surrounding panel of the shifter, this piece, which goes forward to just about under thr ashtray, lifts stright up
To take off the manual shift knob, i believe you pull down on the boot, then unscrew the knob
![Image]()
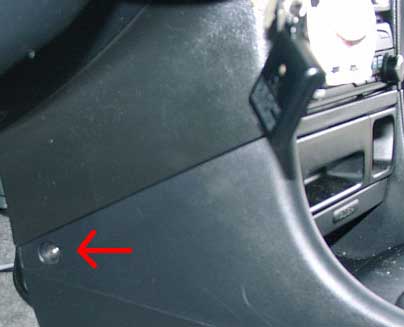
Remove this front screw from each side of the console
![Image]()
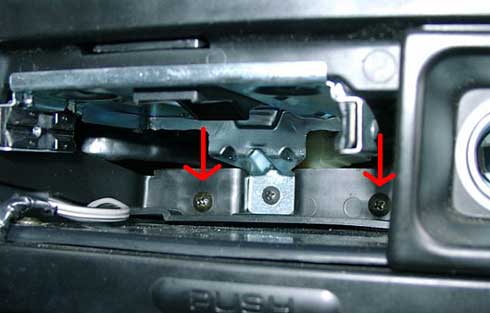
Take out the Ash Tray, remove these two screws (the middle one can stay)
![Image]()
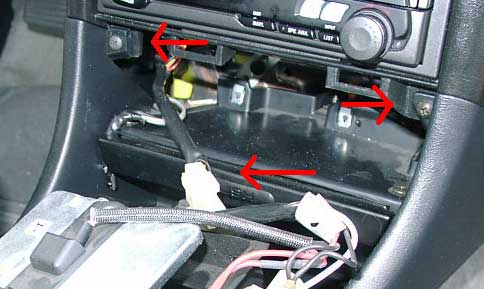
Pull out the assembly by pulling straight back, take out these two screws and unplug the plug feeding the lighter with power
![Image]()
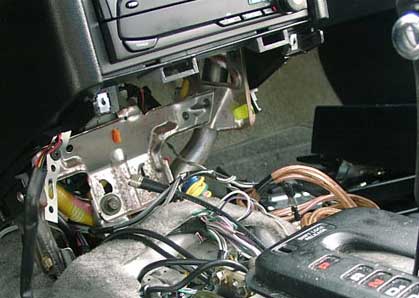
Pull the entire lower console straight back and then up and around the shifter, and look at all the room!! The two screws holding the factory radio assembly are two silver 8mm facing straight down towards the back of this cavity
Also note that the Storage Pocket of the factory radio is attached to the radio, once you take out the two 8mm bolts (shown in next step) the radio and pocket will come out
![Image]()
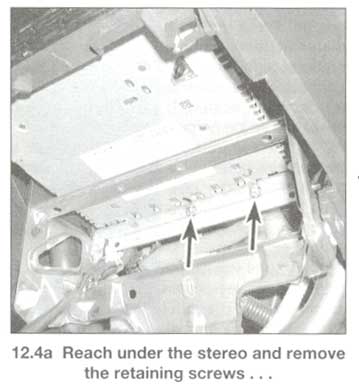
Two screws holding in the factory screws are here (picture from Haynes manual)
Using an 8mm socket, 1/4" Ratchet, and 6" extension, these are easily accessible
To reinstall, reverse above steps
Note! There is a super fast but hard method to get radio out, but you can't get it back in, the method I explain here is the "proper" way
Tools needed:
- Phillips Screwdriver (more preferable than a drill in my opinion)
- Small flathead to pry with
- 8mm socket and ratchet for factory radio removal
Slide both seats all the way forward, and remove these screws on each side.
(The screw to the left you do not have to remove)

Pry up the cover under the parking brake (you'll see a small slot of the left of it), and remove these two screws
No Picture for This Step
Pull out the center console by first pulling straight back about an inch, then up and around the park brake handle
Gently pry at the surrounding panel of the shifter, this piece, which goes forward to just about under thr ashtray, lifts stright up
To take off the manual shift knob, i believe you pull down on the boot, then unscrew the knob
Remove this front screw from each side of the console
Take out the Ash Tray, remove these two screws (the middle one can stay)
Pull out the assembly by pulling straight back, take out these two screws and unplug the plug feeding the lighter with power
Pull the entire lower console straight back and then up and around the shifter, and look at all the room!! The two screws holding the factory radio assembly are two silver 8mm facing straight down towards the back of this cavity
Also note that the Storage Pocket of the factory radio is attached to the radio, once you take out the two 8mm bolts (shown in next step) the radio and pocket will come out
Two screws holding in the factory screws are here (picture from Haynes manual)
Using an 8mm socket, 1/4" Ratchet, and 6" extension, these are easily accessible
To reinstall, reverse above steps


